Establish the connection between AWS RDS and EC2 instance.
Cloud Day Series : Day - 4
Shalom Everyone 👋,
Welcome to Day - 4 of our Cloud Day Series. I'm thrilled to continue this journey with you. Today, we'll dive deep into the world of databases within the AWS Cloud, specifically focusing on how to create them and the magic of establishing a connection between AWS RDS and EC2. For newcomers, I'm Ashok, a recent graduate with a passion for technology and development. On Hashnode, I pen down my insights on DevOps within the AWS Cloud and discuss nuances of React and React Native development.
Now that you know a bit more about me, let's embark on today's Cloud adventure 🚀...
AWS RDS
Amazon RDS (Relational Database Service) is a managed relational database service offered by Amazon Web Services (AWS). if you haven't checked my previous blog Here's a brief overview:
Managed Service: RDS automates time-consuming administrative tasks such as hardware provisioning, database setup, patching, and backups, allowing developers to focus on their applications.
Database Engines: RDS supports several types of database instances including MySQL, PostgreSQL, MariaDB, Oracle, and Microsoft SQL Server.
Scalability: Users can easily scale their database's compute resources up or down, depending on the needs of the application. Some RDS database engines also offer automatic scaling.
High Availability & Failover: RDS provides the option of setting up a Multi-AZ deployment. In this configuration, Amazon RDS automatically provisions and maintains a synchronous standby replica in a different Availability Zone. This results in automatic failover in the event of planned or unplanned outages.
Backups & Recovery: Amazon RDS performs automated backups of database instances, allows manual backups, and provides automated software patching. The service also allows users to recover their database to any second during the retention period, typically up to the last five minutes.
Security: RDS offers multiple levels of security, including network isolation using Amazon VPC, encryption at rest using keys created and controlled via AWS Key Management Service, and encryption in transit using SSL.
Integrated with AWS: Being a native AWS service, RDS integrates seamlessly with other AWS services, making it easier for developers to use RDS in their AWS-based applications.
Pricing: With Amazon RDS, users pay for what they use. There are no upfront costs, and users can benefit from the scalability of the service to match their application's needs.
RDS is suitable for developers who want the benefits of a relational database without the hassle of managing the underlying infrastructure and administrative tasks, making it a popular choice for a wide range of applications.
How to create an RDS Database ...?
Here's the revised version with proper grammar and a more human-sounding tone:
Open your AWS Management Console and navigate to 'Services'. From there, select the RDS Service.
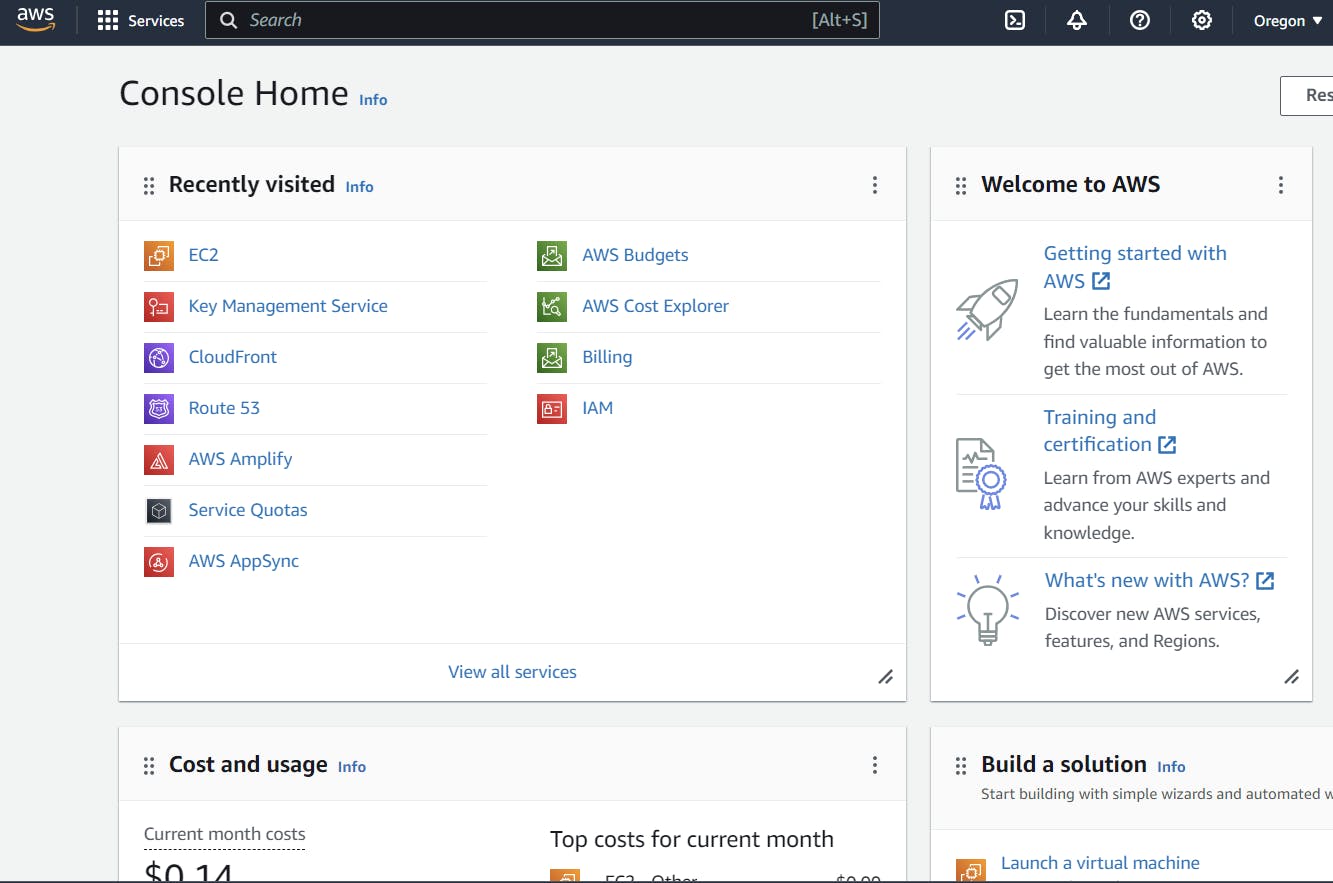
From there, select the RDS Service.
.
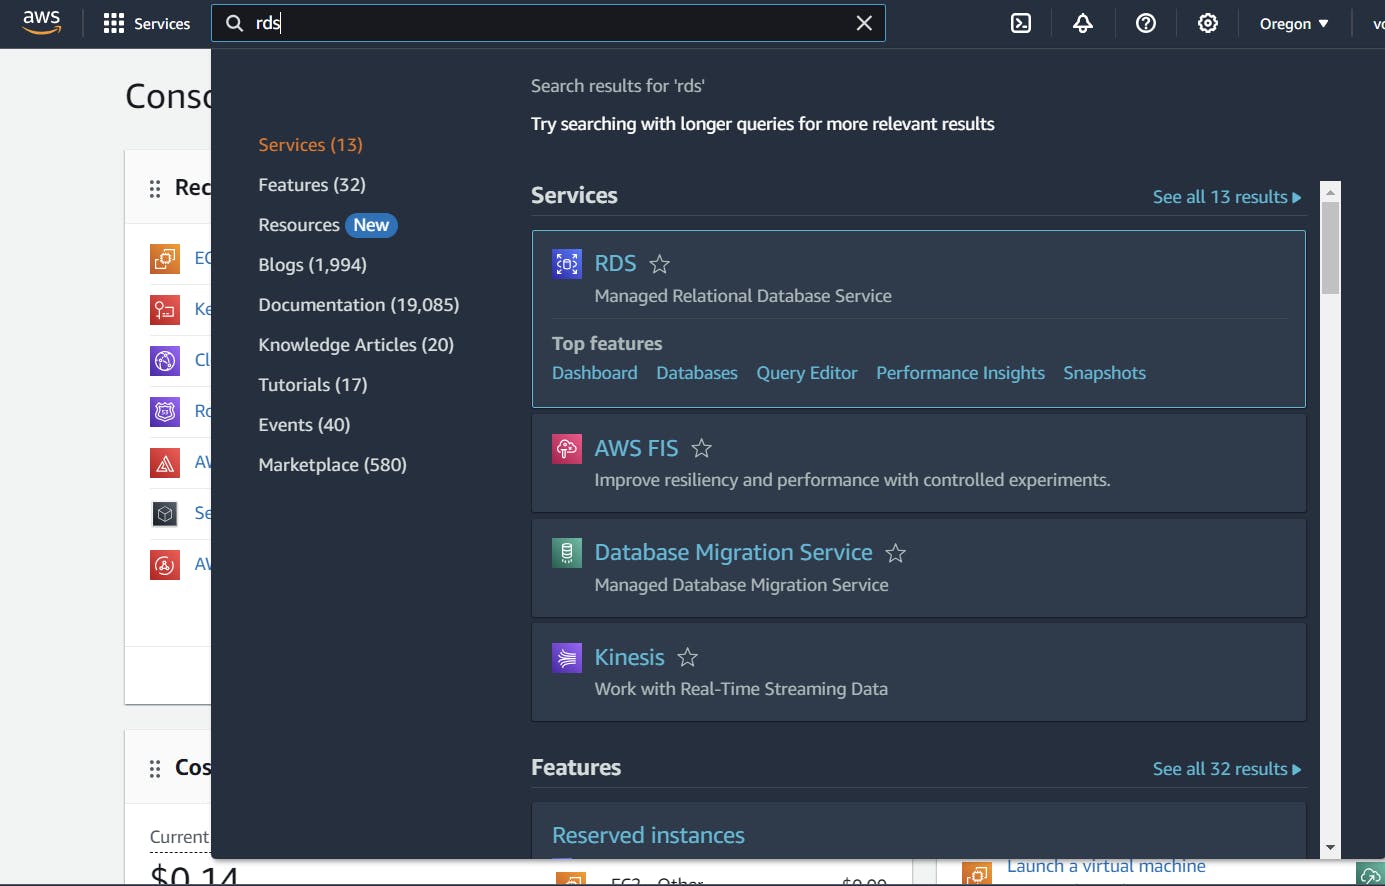
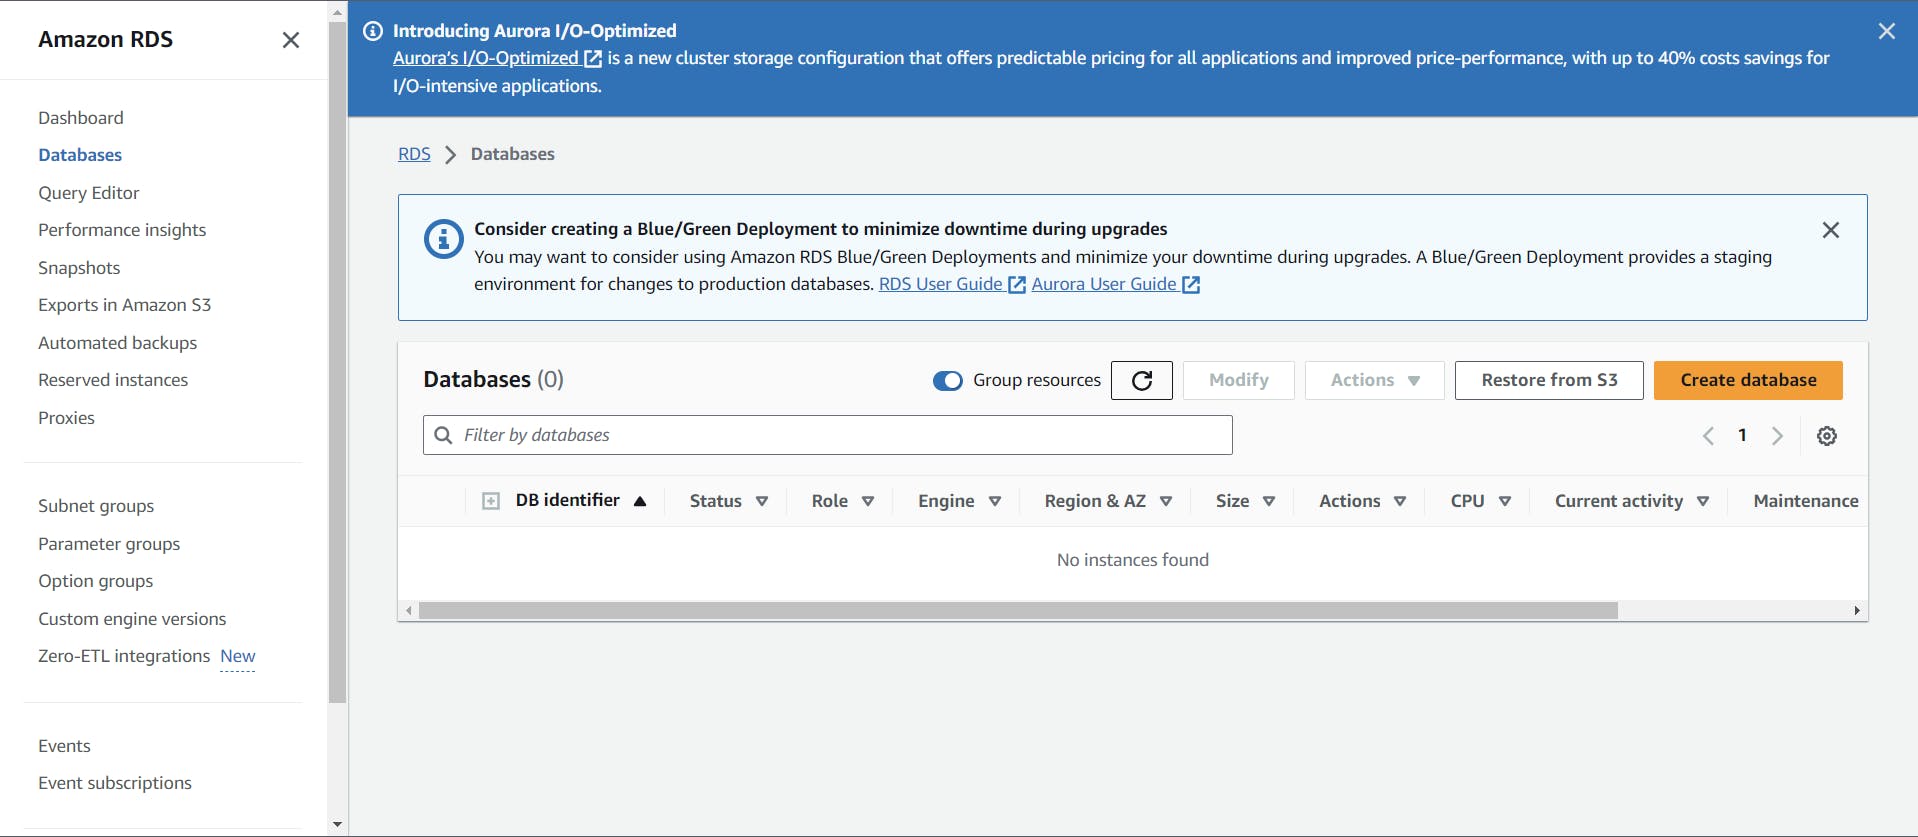
Once you're on the RDS dashboard, you'll find an option labeled 'Create Database'. Click on it. This will take you to a new page where you can set up all the configurations for your RDS database.
When choosing a database creation method, select the standard one."
AWS RDS provides this two modes for setting up databases: "Standard Create" and "Easy Create."
The "Standard Create" mode grants users complete control over all database settings, making it ideal for configuring production-ready databases with precision. This mode allows users to fine-tune settings related to security, backups, networking, and more.
Conversely, "Easy Create" streamlines the setup process, designed for rapid deployment. It employs default settings for many options, making it perfect for quick deployments or prototypes. While it expedites the setup and requires minimal user input, it doesn't delve into advanced configurations.
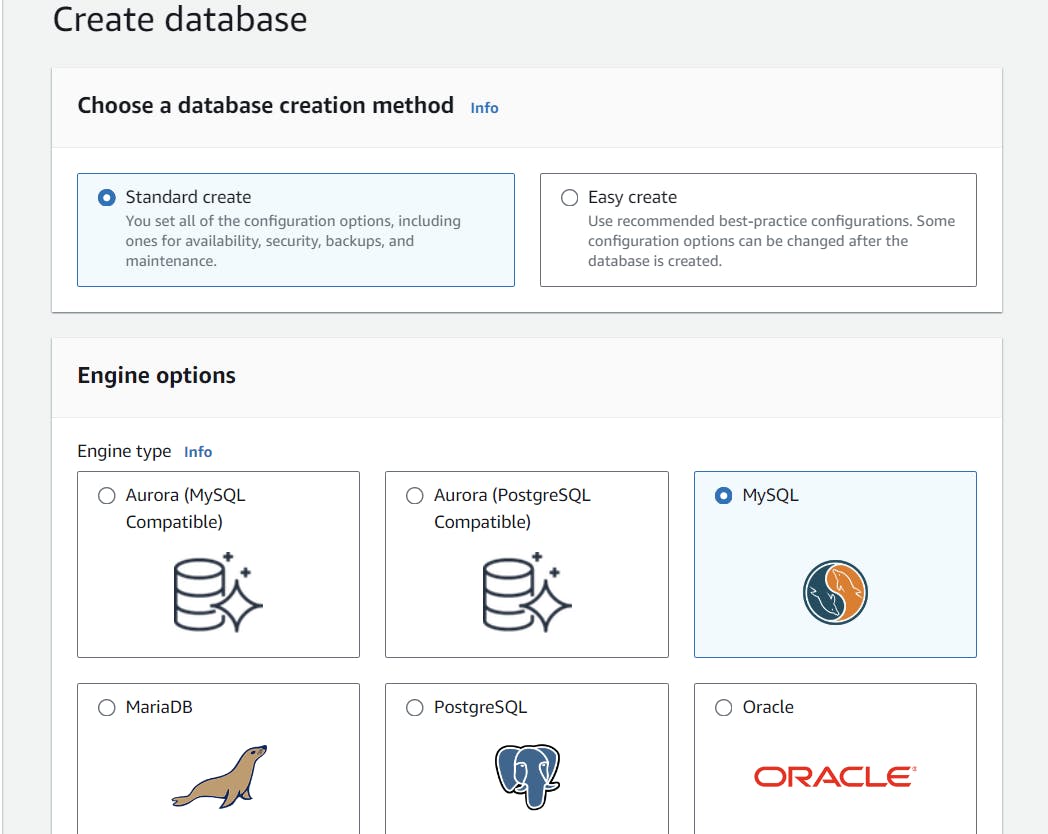
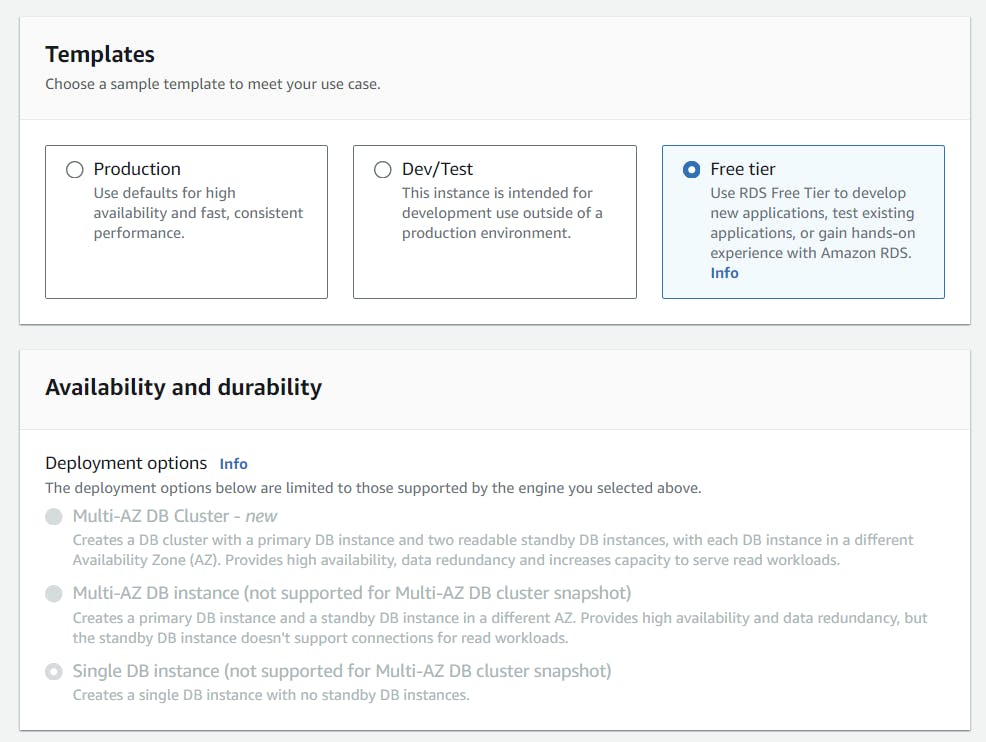
Regarding engine choices, I opted for the MySQL engine for my database. Additionally, I chose the free-tier option to prevent any unexpected charges.
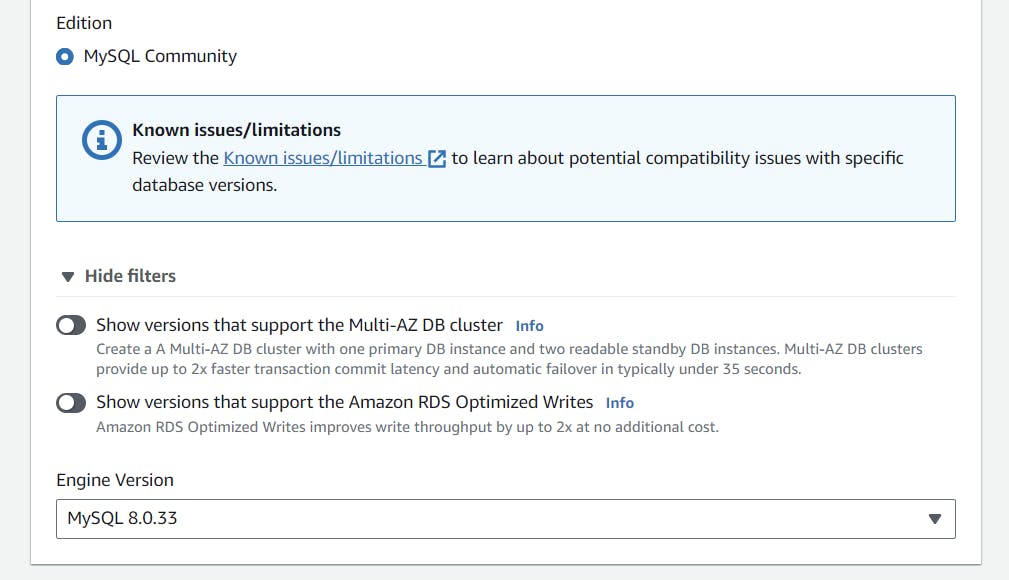
When it comes to deployment models,
Single-AZ Deployments put your database in one location. They're good for testing or apps that don't need to be up all the time. However, they're not great for really important systems that need to run constantly. Multi-AZ Deployments, on the other hand, have a backup of your database in a different location. So, if there's a problem in one place, AWS can switch to the backup. This is good for important systems that need to be available all the time.
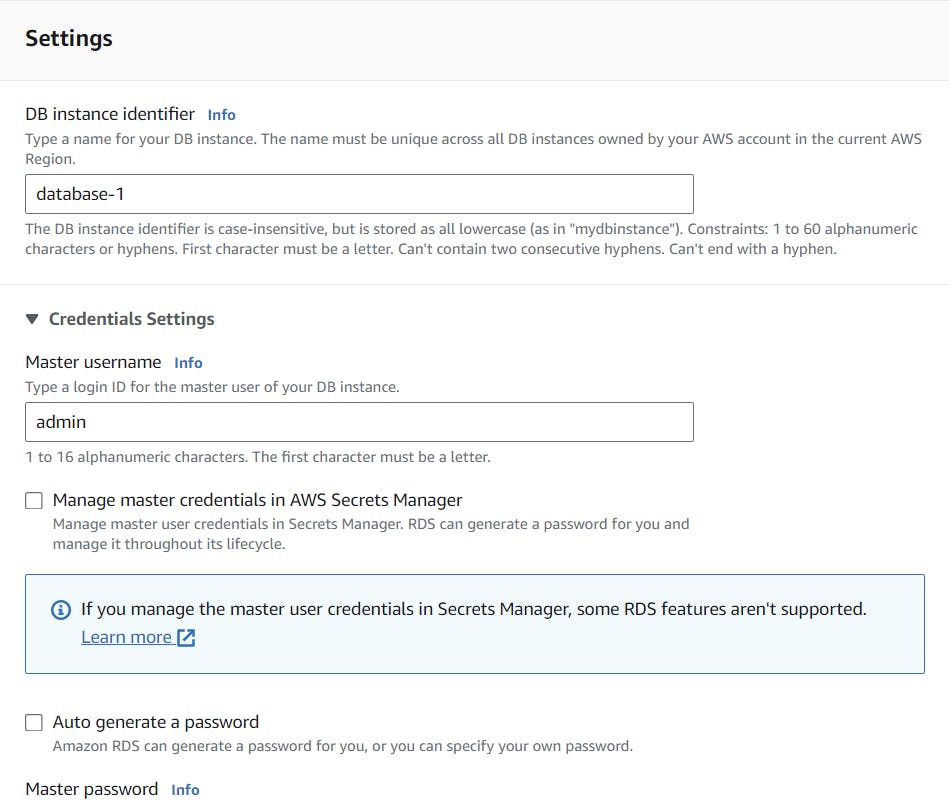
Now, we'll name our database and create a username and password. We'll use these details later to connect with EC2, so it's important to write them down. Instead of using an auto-generated password, I'm choosing my own.
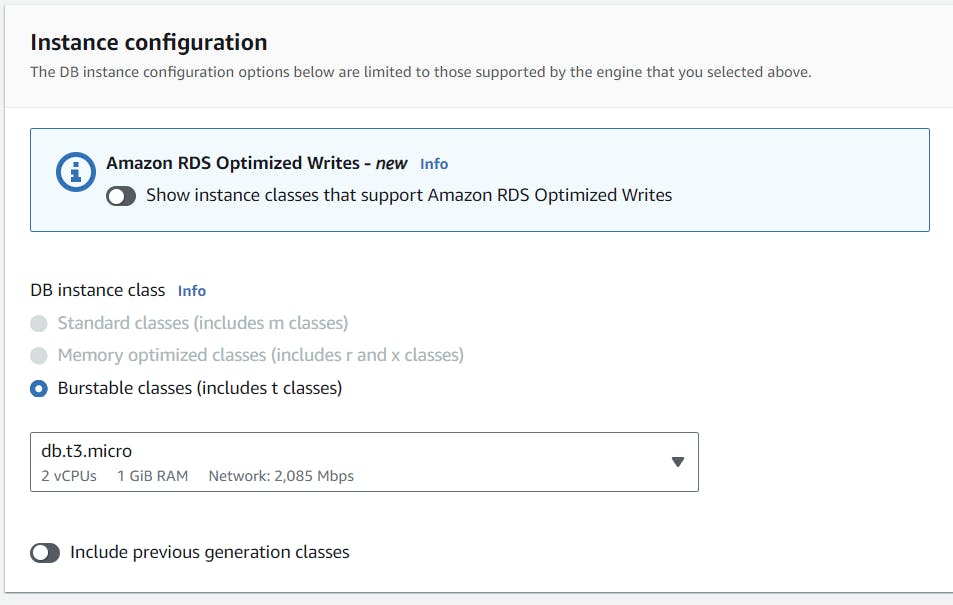
For instance configuration, the default selection is 't3'. However, I'm opting for 't2.micro' as it suffices for our current needs.
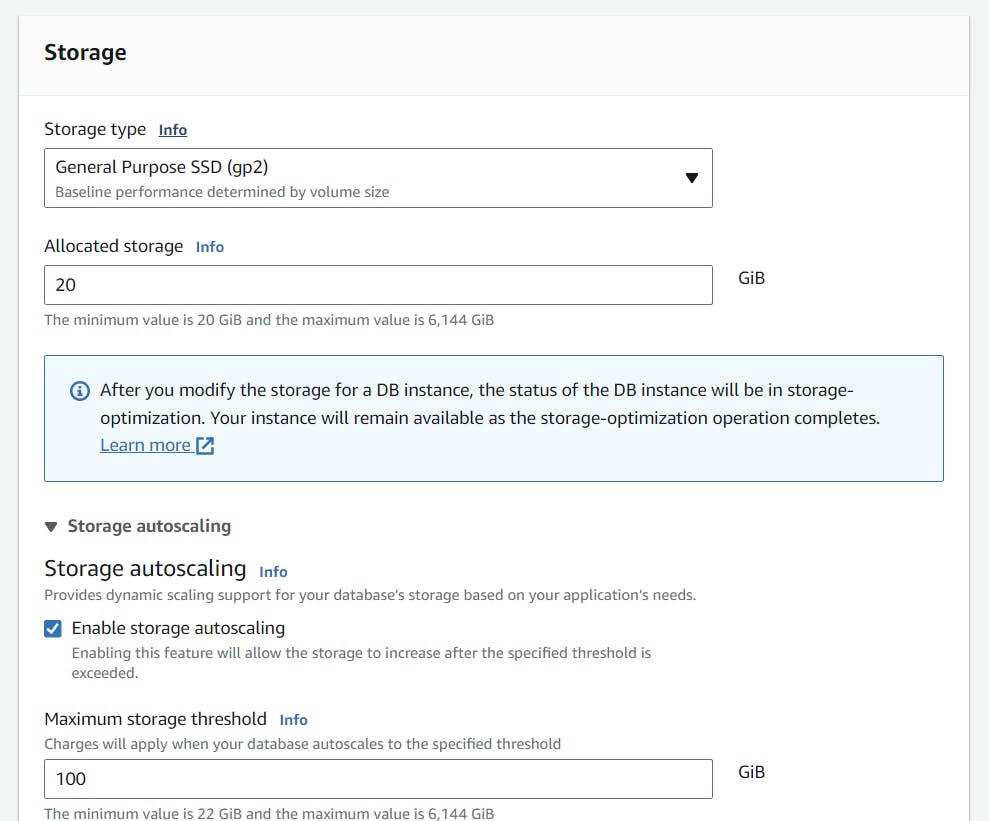
Next, decide the storage capacity for your database instance. I'm going with 20 GB. If you believe this won't be adequate for your project, consider choosing 30 or 40 GB. Alternatively, enable Storage Autoscaling. This feature will automatically expand your database instance when you surpass the initial limit.
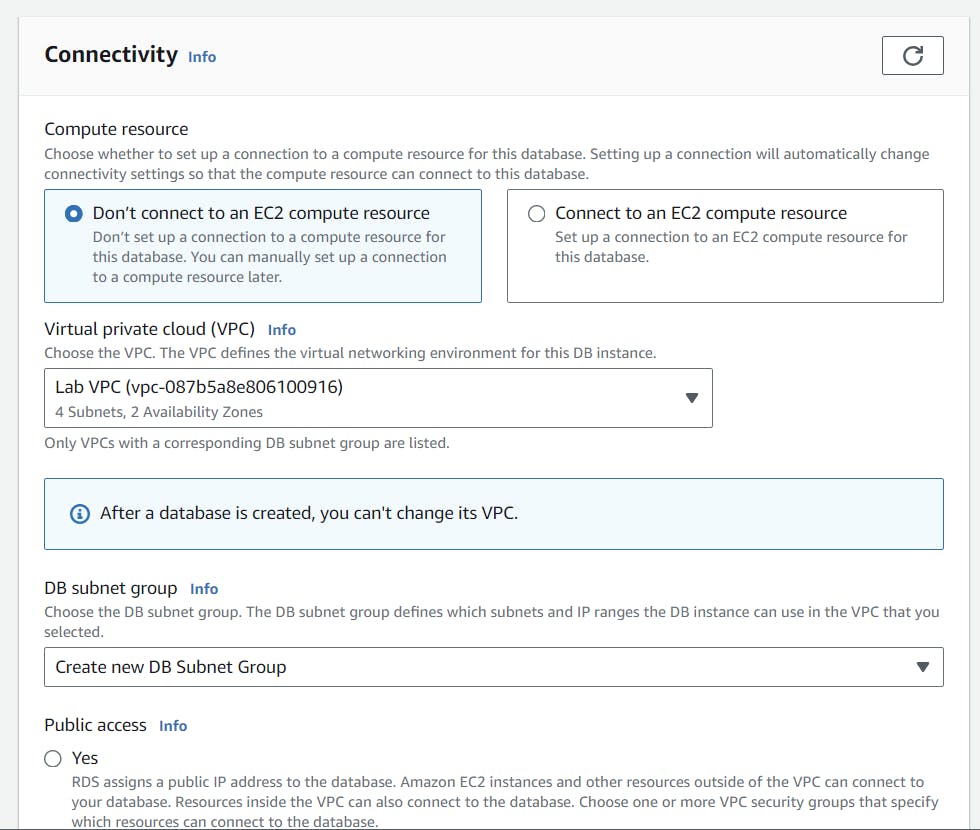
In the connectivity section, I haven't linked our EC2 server with the database instance yet. So, I'm choosing the option to not connect to the EC2 instance. Please ensure you don't grant public access to the database for security reasons.
In the additional configuration section, you'll notice the database port. This port is crucial for connecting with applications.

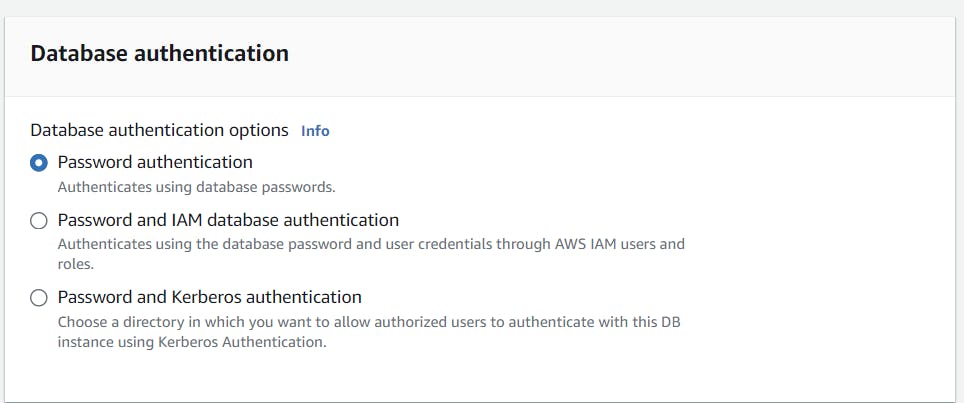
As for database authentication, select the 'password' option. We'll use the password we set earlier to connect to our database instance.
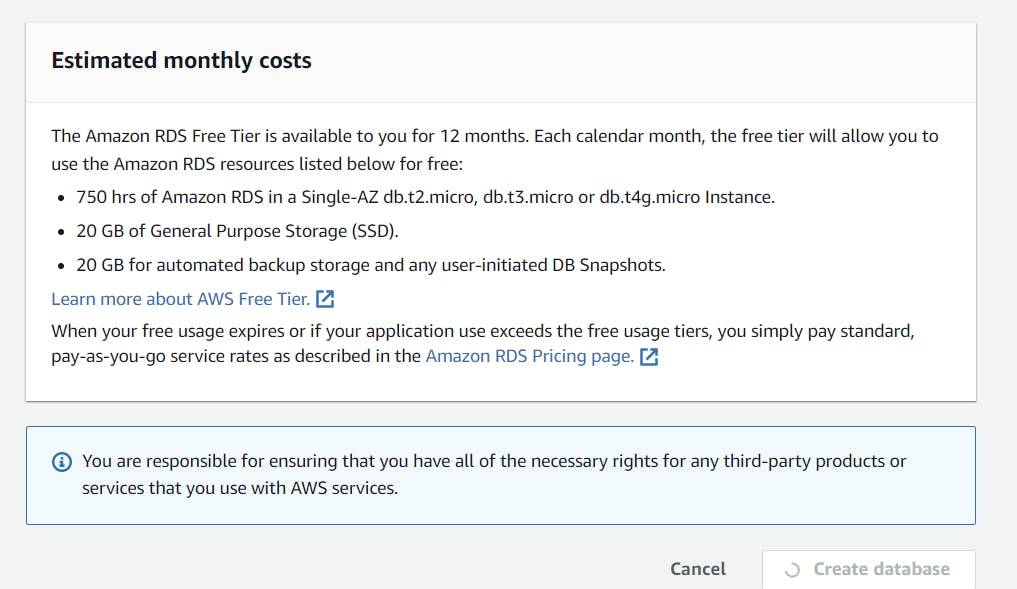
With everything in place, click on 'Create Database'. The setup might take a while, so be patient as it gets ready.
Creation of our EC2 instance...
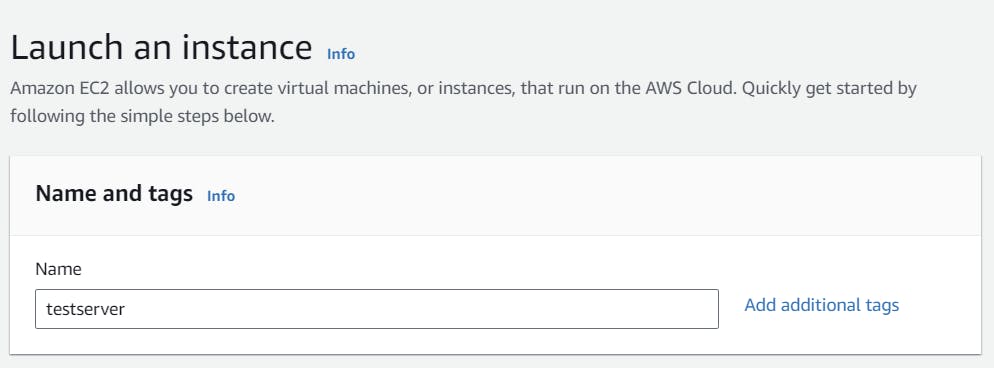
Meanwhile, let's set up an EC2 instance. Navigate to the EC2 Service Dashboard and choose 'Launch Instance'. Name your instance 'testserver'. You can give your own name if you want.
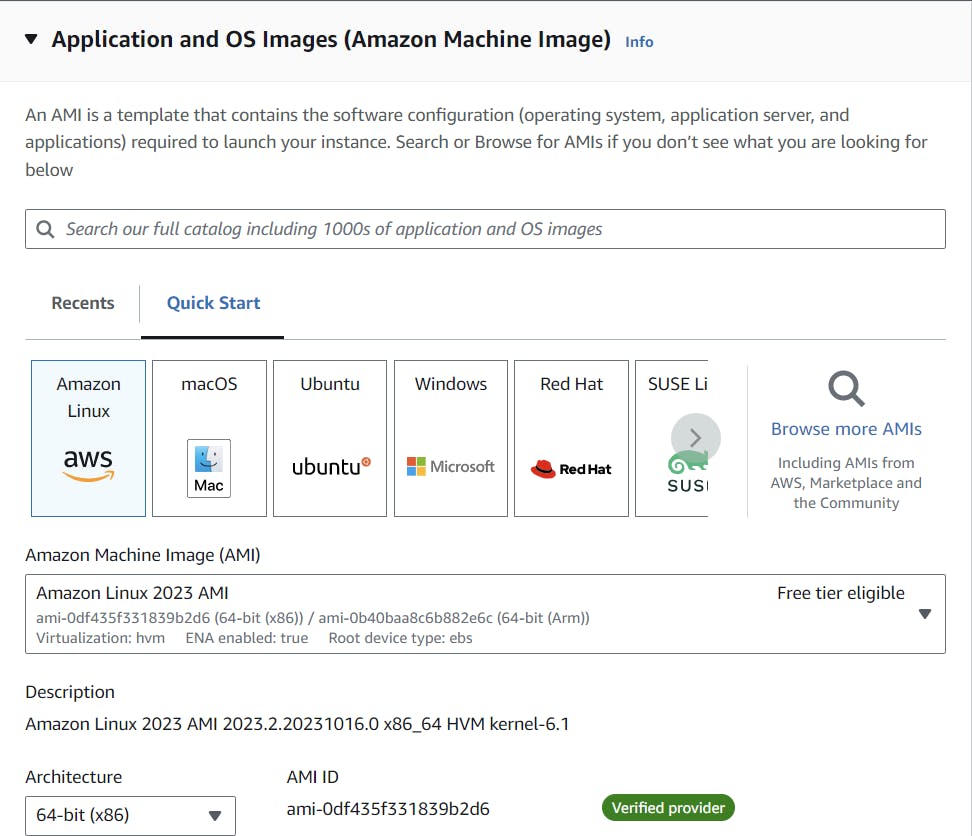
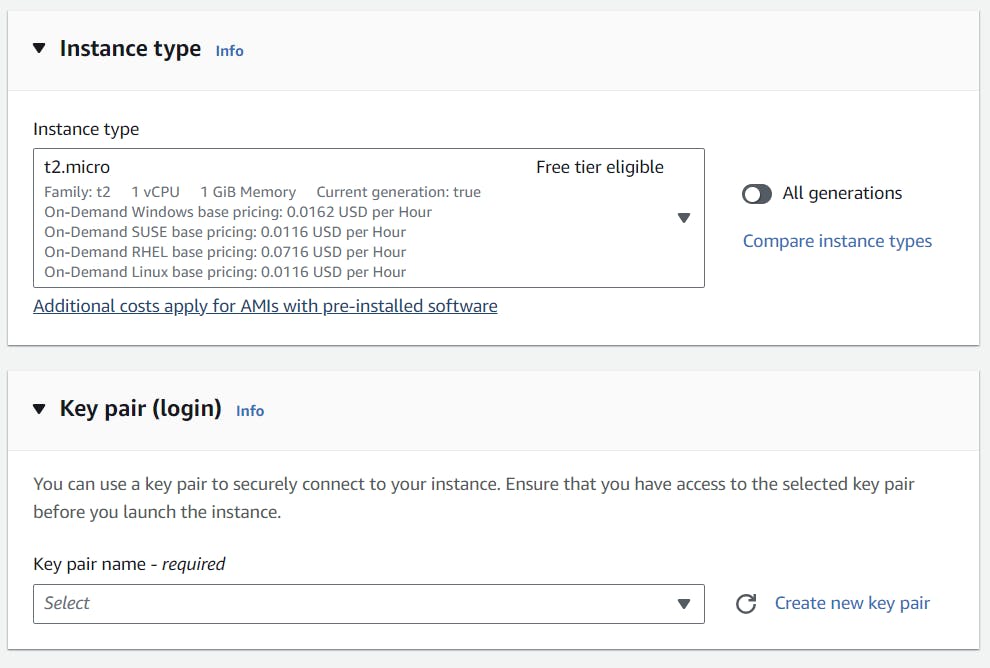
Choose the Linux AMI image for 2023. For the instance type, pick 't2.micro' since it falls under the free tier.
Next, create a key pair.
For the networking part, ensure you select the same VPC and availability zone that you chose for the database instance.
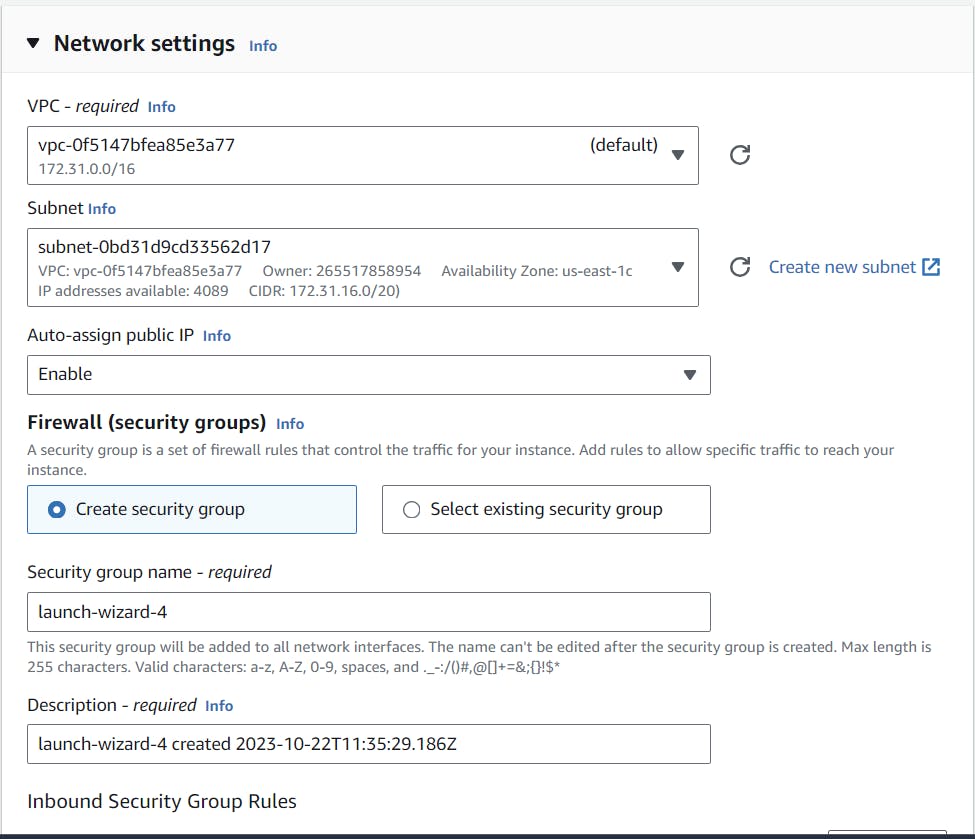
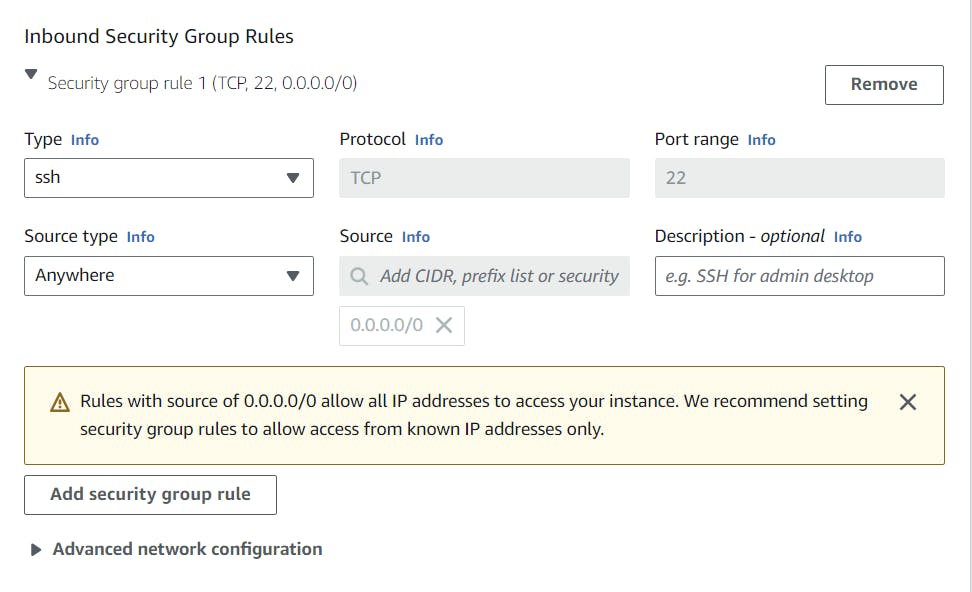
Regarding security groups, permit SSH and leave the other settings unchanged.
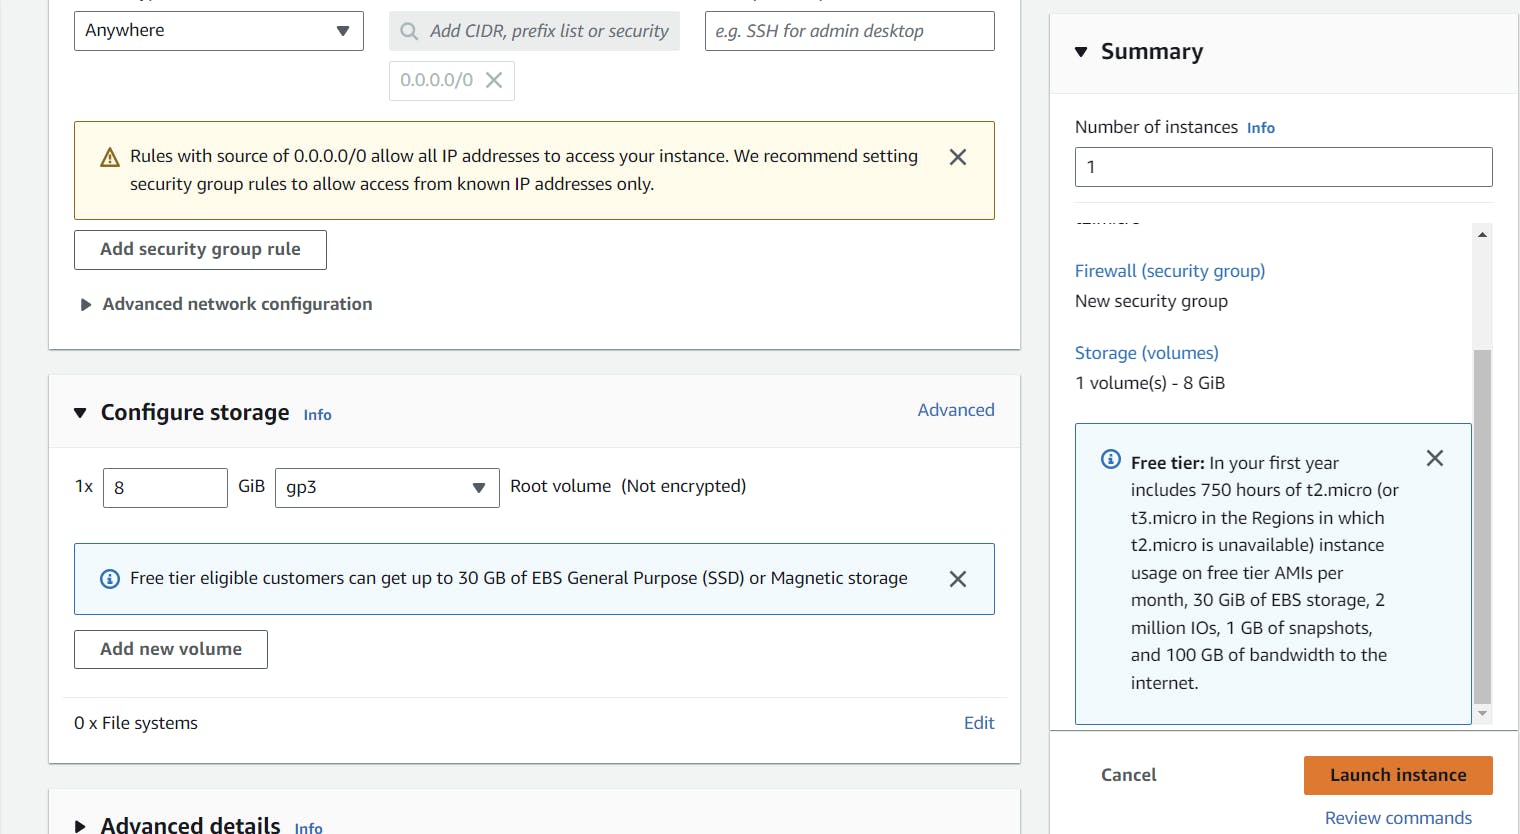
Click on 'Launch Instance'.
Connecting AWS RDS and EC2 instance
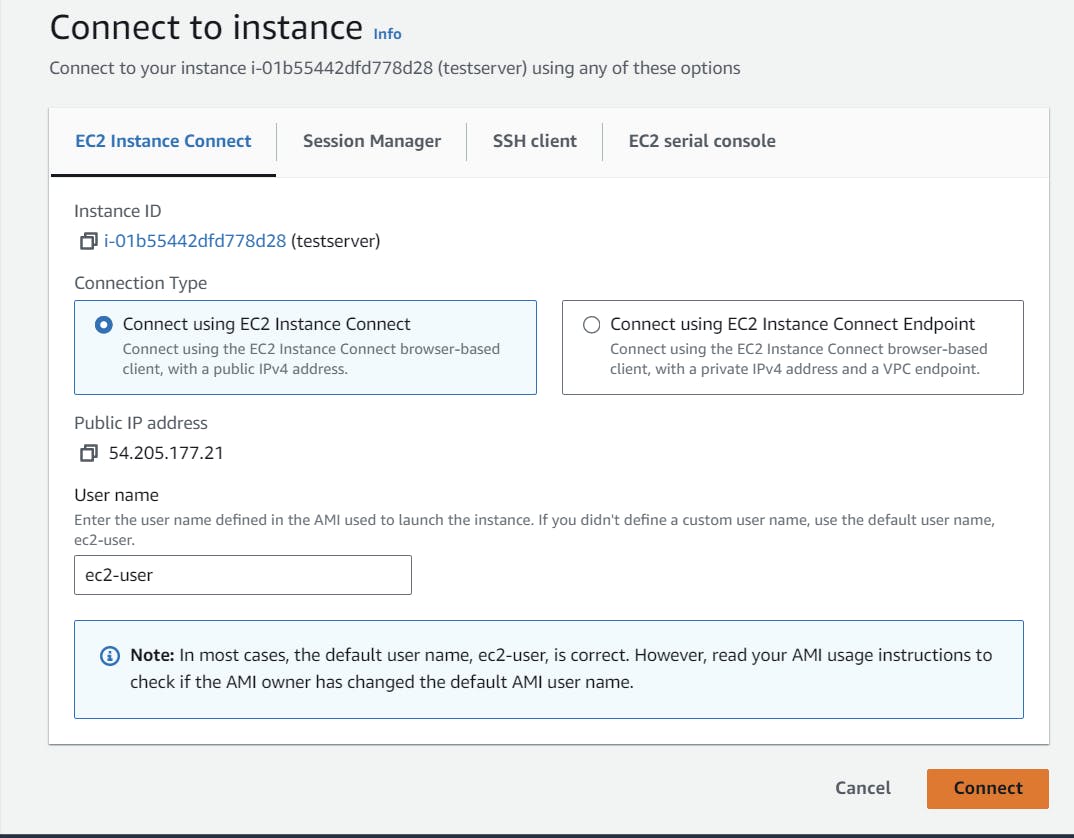
Once your instance reaches a 'running' state, select it and click on 'Connect'.

In the EC2 instance connection prompt, click 'Connect' again. You can then begin working with your instance.
Return to the database section, and under 'Connectivity and Security', note down the port number and endpoint. When connecting to this database via EC2, these details are crucial.
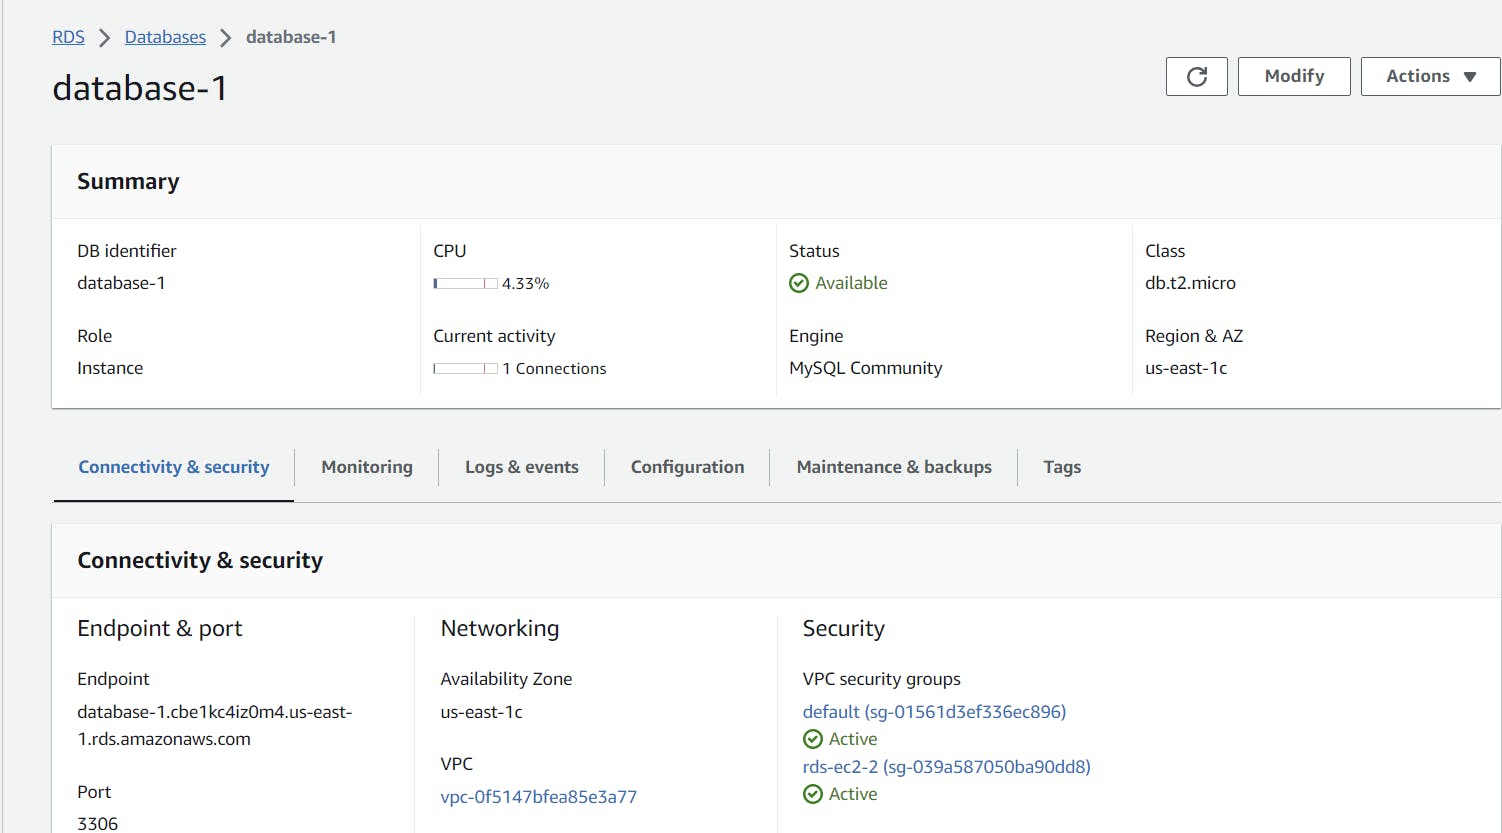
Most Linux distributions include the MariaDB client instead of the Oracle MySQL client. To install the MySQL command-line client on Amazon Linux 2023, run the following command in the Command terminal of our EC2 instance.
sudo dnf install mariadb105
To check the version of your MySQL command-line client, run the following command
mysql --version
To read the MySQL documentation for your current client version, run the following command
man mysql
The connection information for a DB instance includes its endpoint, port, and a valid database user, such as the master user. For example, suppose that an endpoint value is
mydb.123456789012.us-east-1.rds.amazonaws.com. In this case, the port value is3306, and the database user isadmin. Given this information, you specify the following values in a connection string:
For host or host name or DNS name, specify
mydb.123456789012.us-east-1.rds.amazonaws.com.For port, specify
3306.For user, specify
admin.
So to connect with our Database , make sure to follow this pattern. After entering this, it will ask you to enter the password which we given when we setting the database. If you follow the steps correctly. You will get response like this.
mysql -h mysql–instance1.123456789012.us-east-1.rds.amazonaws.com -P 3306 -u mymasteruser -p

that means we successfully set up the connection between the EC2 and AWS RDS Database. Now you can create databases, tables, and records in your database instance from your EC2.
We learned, how to create and establish connections between EC2 and AWS RDS.
Now, Let's see how to create a dynamo DB database.
AWS DynamoDB
DynamoDB is a managed NoSQL database service offered by Amazon Web Services (AWS). It's designed to provide fast and predictable performance with seamless scalability. if you haven't check my previous blog. Here's a concise overview :
NoSQL Nature: Unlike traditional relational databases, DynamoDB is a NoSQL database, meaning it does not rely on a fixed schema with tables, rows, and columns. Instead, it uses tables, items, and attributes as its core components.
Performance: DynamoDB is designed for high availability and delivers single-digit millisecond performance at scale.
Scalability: One of its standout features is its ability to auto-scale. As your data and traffic grow, DynamoDB automatically distributes the data and traffic over multiple servers to maintain performance.
Durability and Availability: It stores data on solid-state drives (SSDs) and replicates it across multiple AWS Availability Zones, ensuring high durability and availability.
Flexibility: Being schema-less, it's flexible and can store structured or semi-structured data like JSON.
Integrated with AWS: It's deeply integrated with other AWS services, making it easier for developers to create end-to-end applications in the AWS ecosystem.
Pricing: DynamoDB charges users based on the amount of read and write capacity they provision, or users can choose an on-demand pricing model where they pay for the actual reads and writes they perform.
DynamoDB is ideal for use cases that require consistent, single-digit millisecond latency and where there's a need to scale from small to massive amounts of data, such as mobile apps, gaming, ad tech, IoT, and many other applications.
How to create AWS Dynamo DB...?
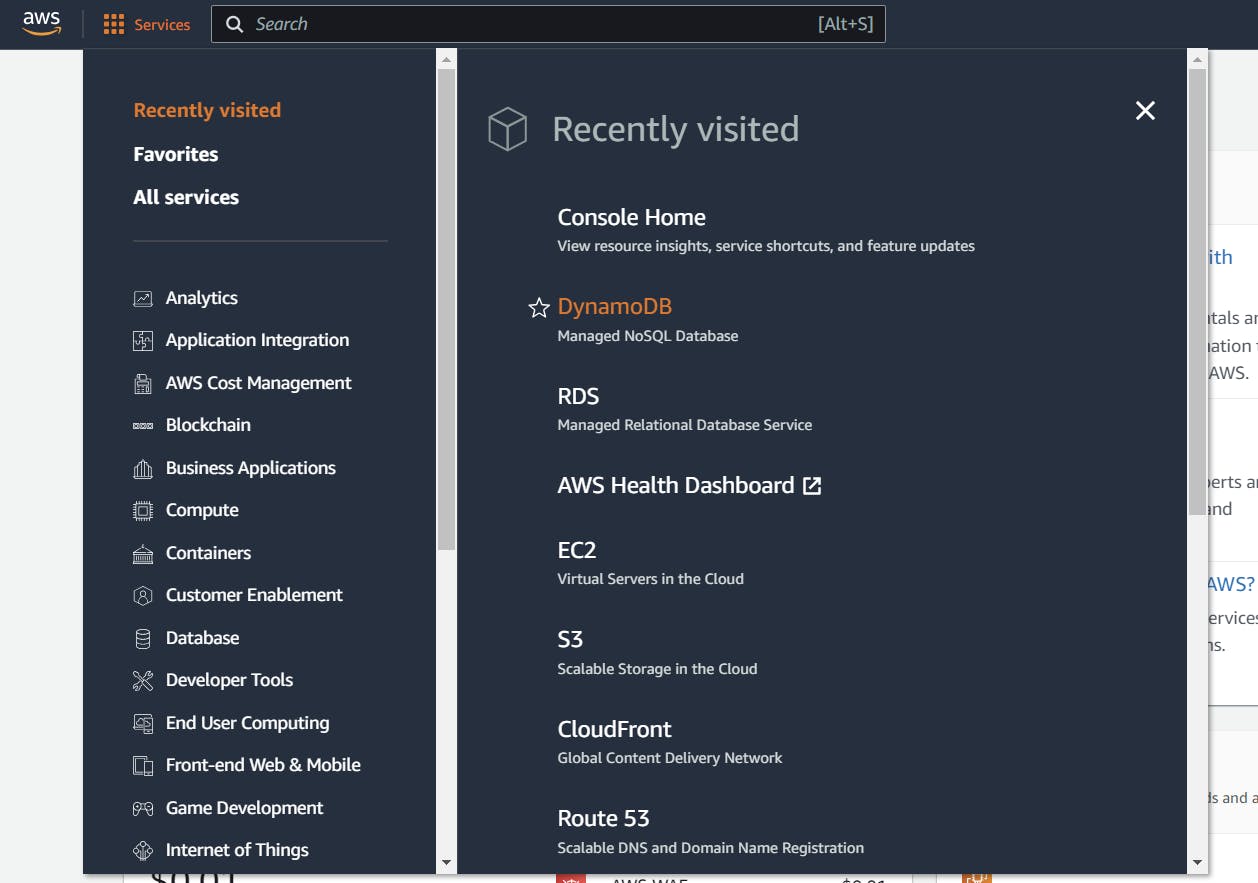
Open your AWS Management Console and navigate to 'Services'.
From there, select the DynamoDB Service.
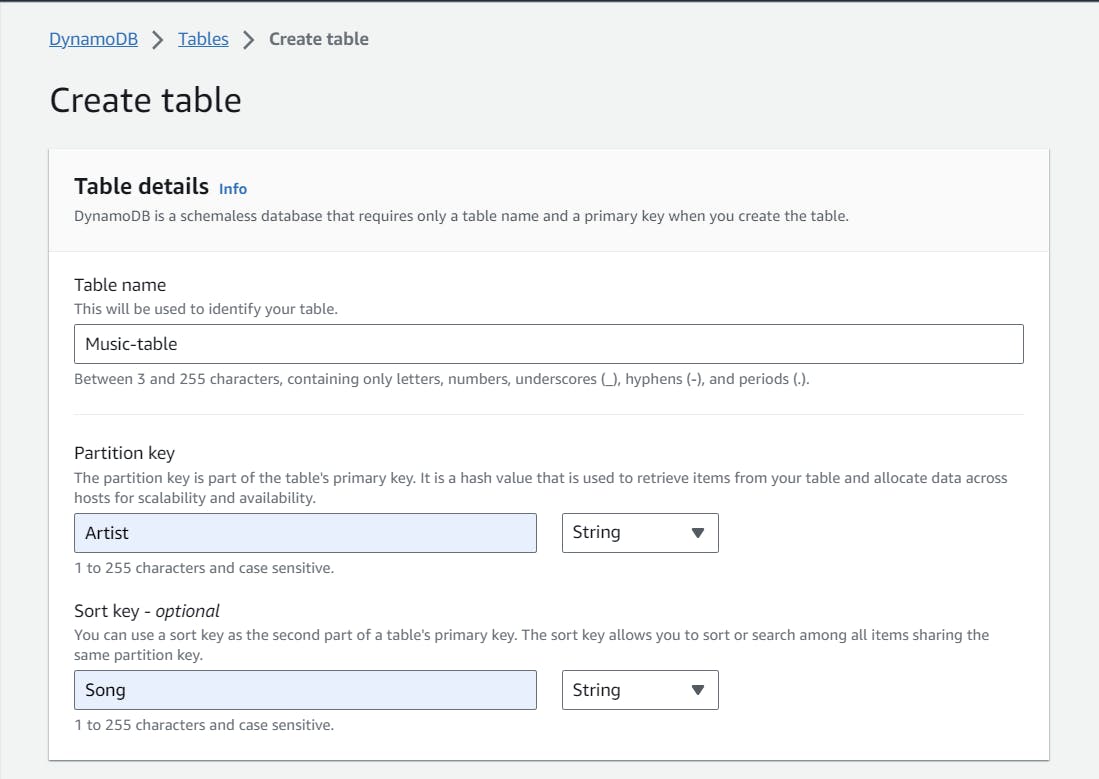
Create a table with a name, here i am creating a collection of songs. Im giving it as Music-table. the roles of the partition key and sort key are crucial for data storage and access optimization. The primary purpose of the partition key is to evenly distribute data across various storage nodes, ensuring both optimal scalability and performance. Each value of the partition key maps to a unique storage partition. DynamoDB then uses this value to hash and determine the specific internal storage location for the item.
Let's apply default settings, and you can notice what they are
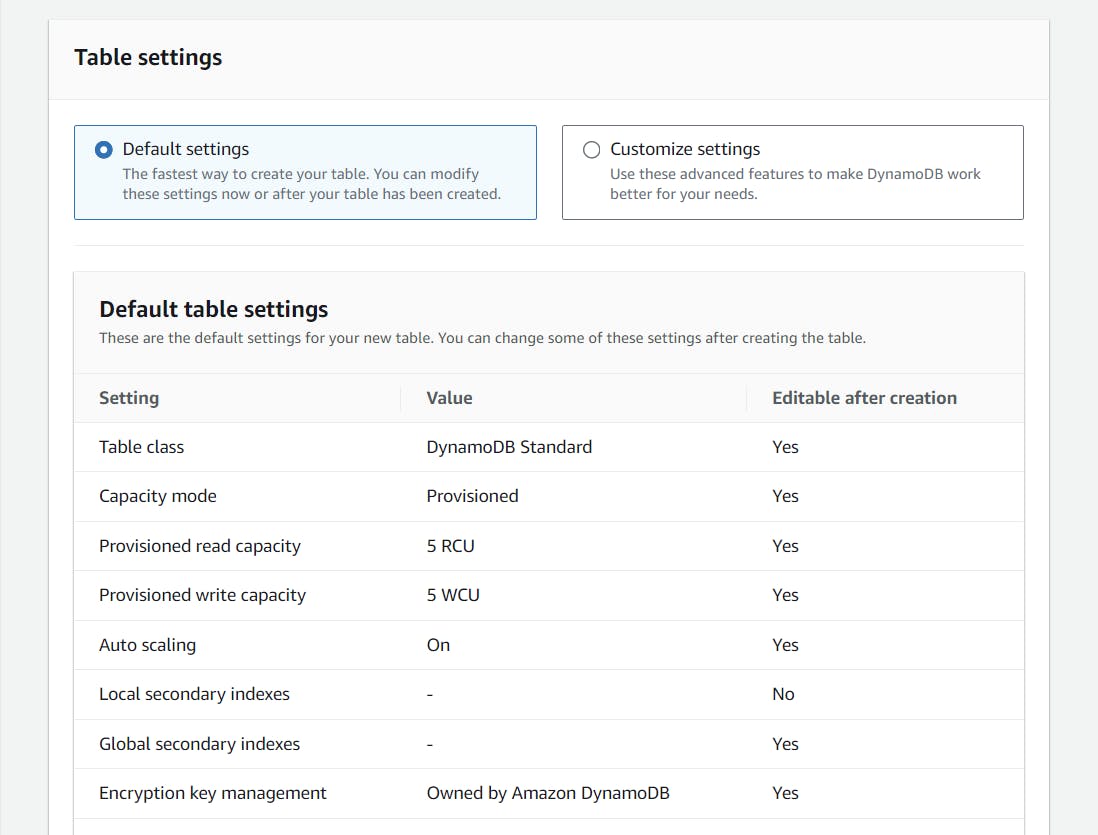
Now, Click on Create table.
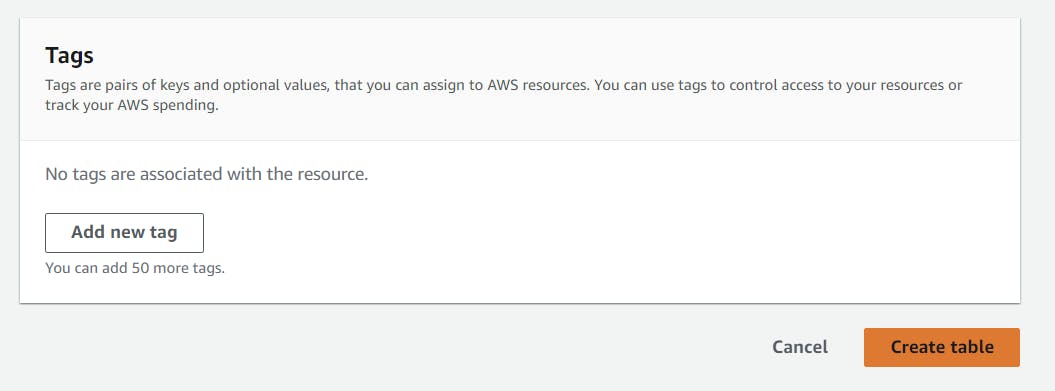
After the creation of the table.

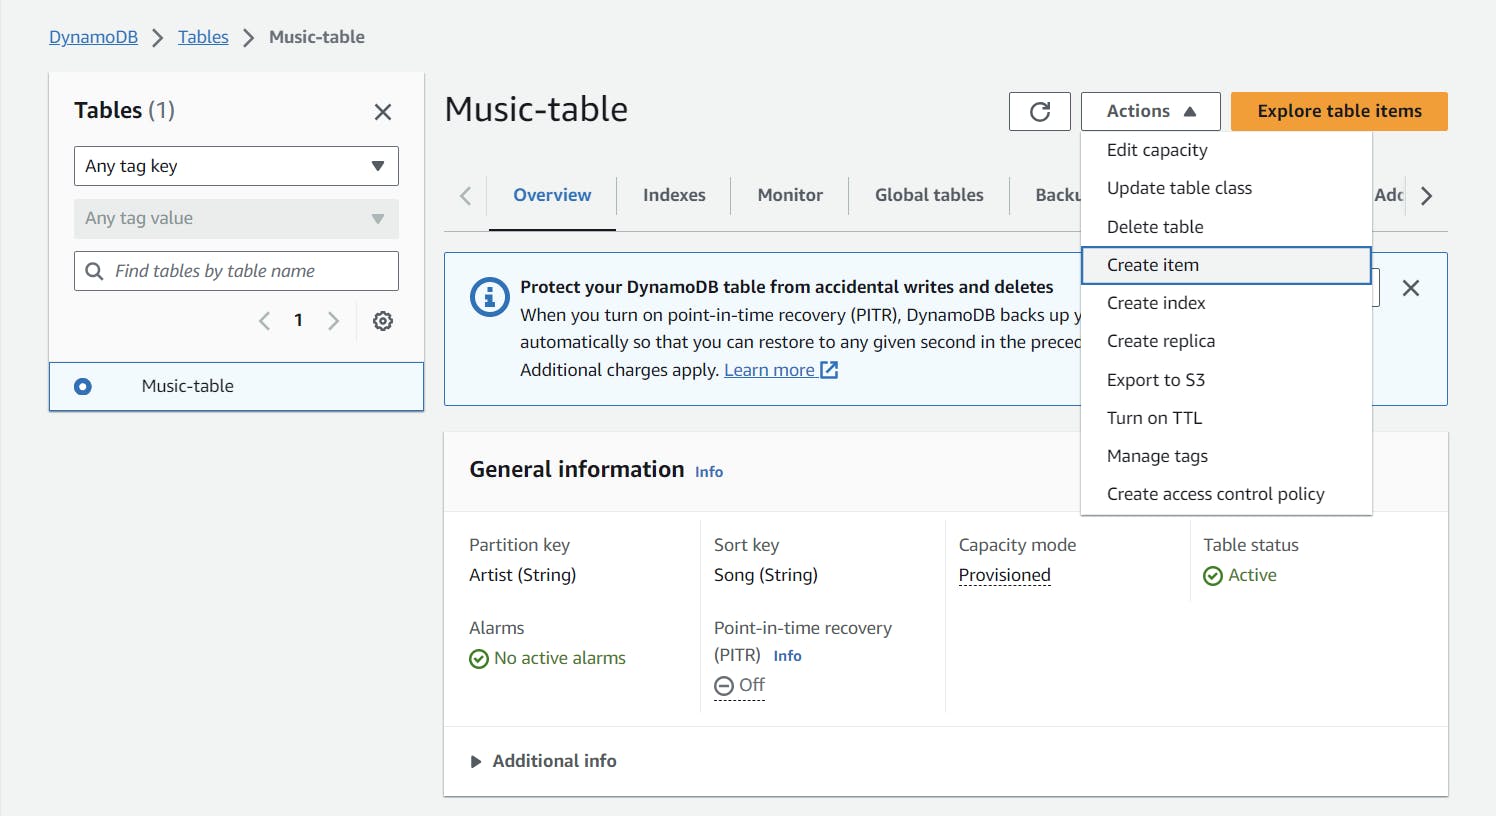
select the table and click on actions. You will find different options and select the Create item in it.
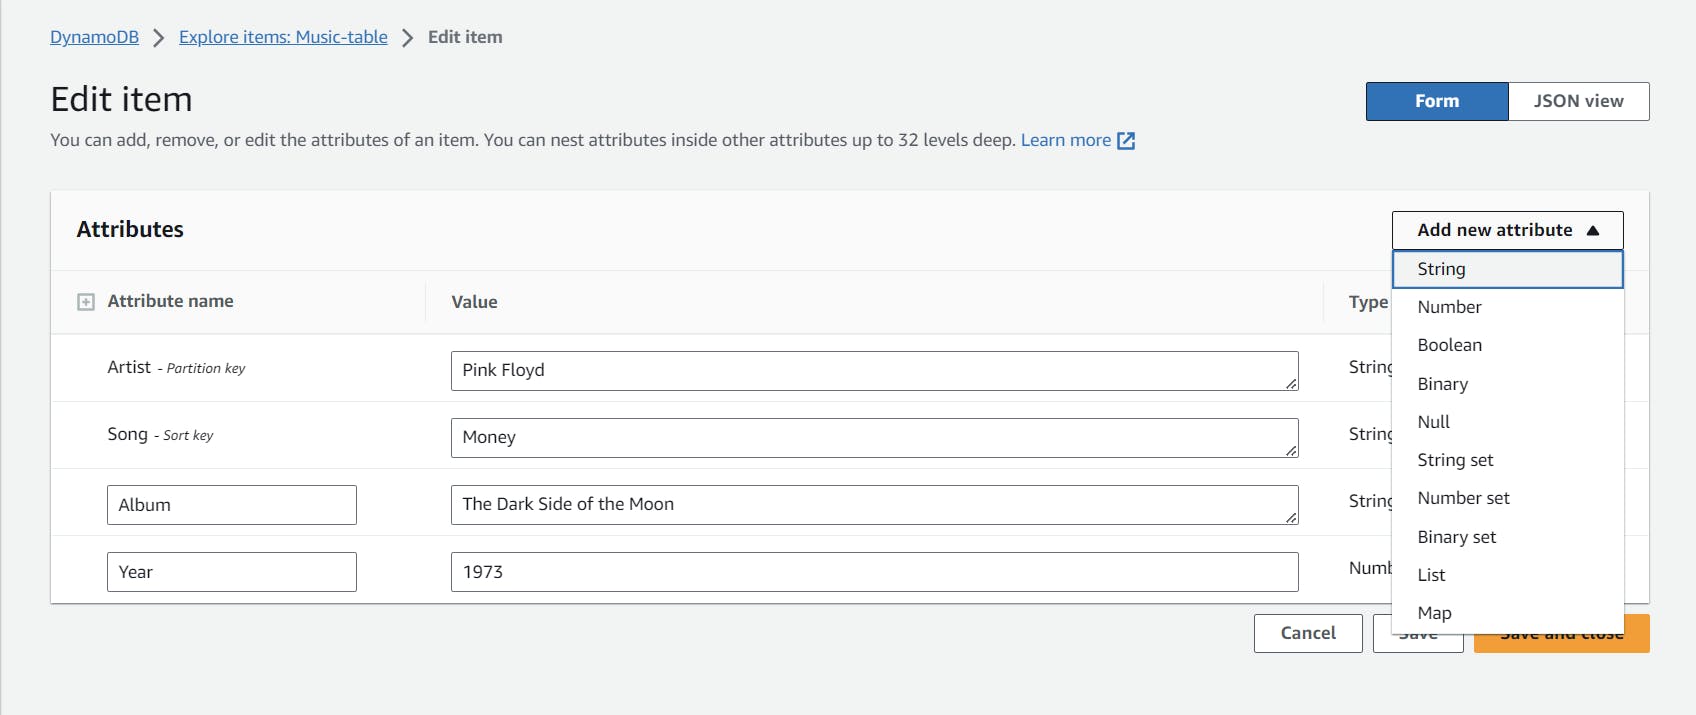
You can add more attributes to the tables by selecting the "add new attribute" on left side. Click on save. You successfully created a table in AWS DynamoDB. Compare with AWS RDS. This is so easy and fast. You can create multiple items in a similar manner. You can also see a JSON view of your data by selecting the "JSON view".
Conclusion
I trust today's in-depth exploration shed light on creating databases in AWS and connecting AWS RDS with EC2. If you found it valuable, please show some love with a ❤️ and share your thoughts 🤗. Keep pushing boundaries and delving deeper! 🚀
See you in our next installment of the Cloud Day Series... Farewell for now! 👋
Let's connect on ...
